Note: The GeoCoding is the process of converting an address into geographic coordinates. It will help plot you property location on maps in distribution channels and automatically links it to main points of interests in the area.
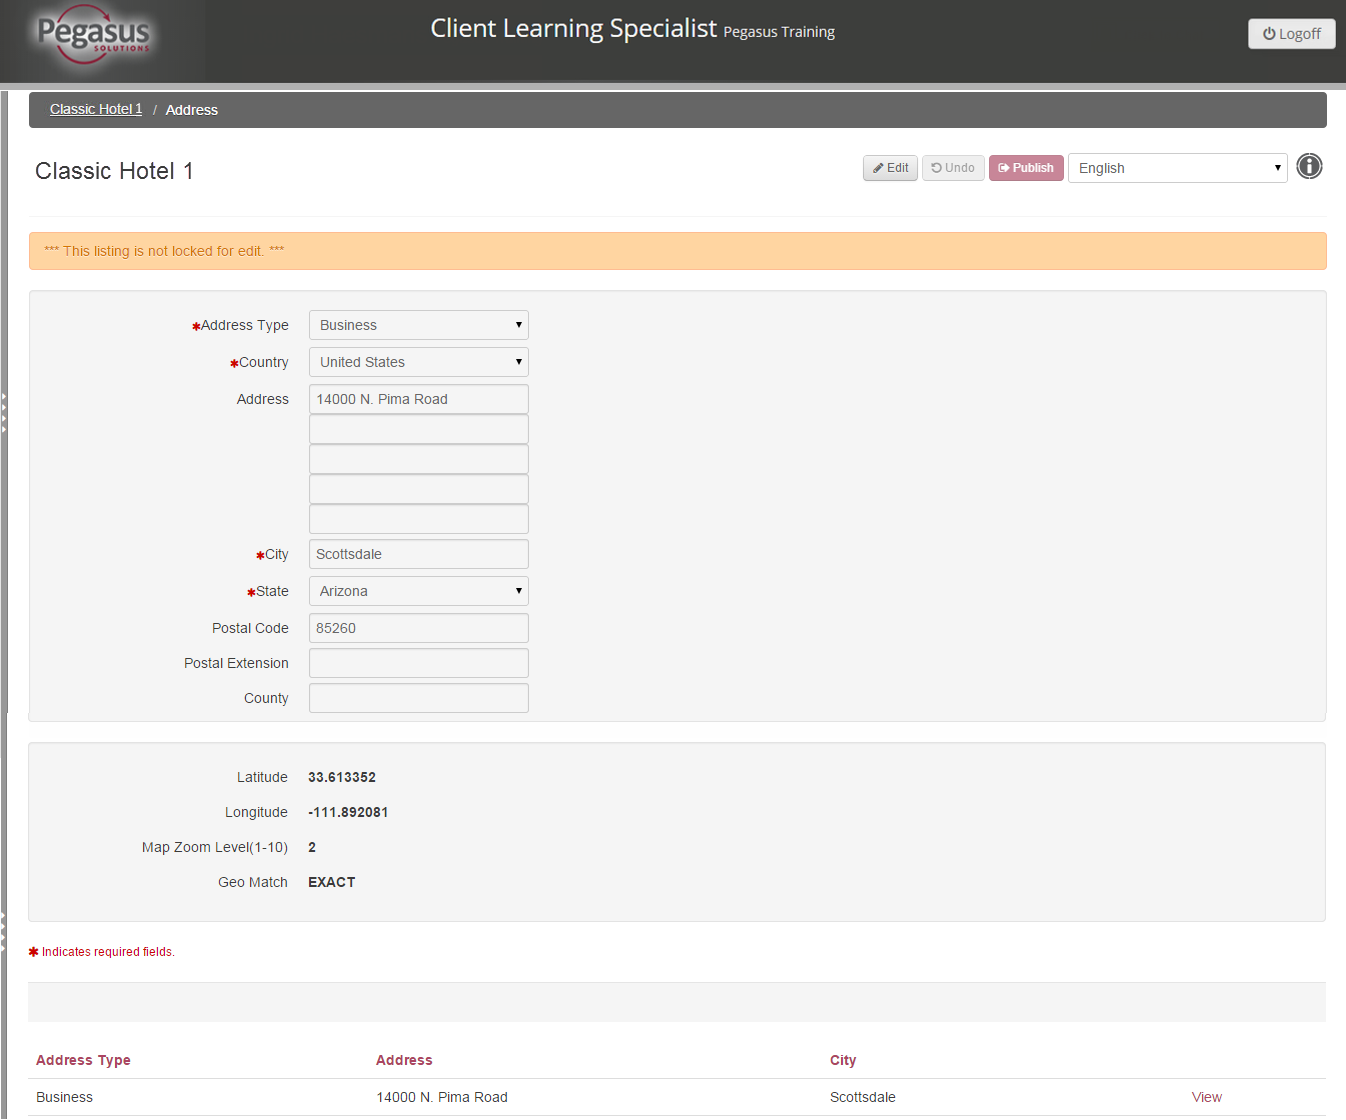
The Address screen displays the address information for a property. It also shows the GeoCode automatically generated from the property address.
Note: The GeoCoding is the process of converting an address into geographic coordinates. It will help plot you property location on maps in distribution channels and automatically links it to main points of interests in the area. |

Note: You need to be signed in as an administrator to add an address. |
Follow the steps below to add an address for your property:
Step |
Action |
||
1 |
Click the Address link from the Property dashboard. | ||
2 |
Click the Edit button to place the screen in edit mode. |
||
3 |
Click the OK button to confirm. |
||
4 |
Click the +Add New button located at the bottom of the page. | ||
5 |
From the Address Type
drop-down menu, select the address type.
|
||
6 |
In the address information fields, enter the property address, starting with the Country field.
|
||
7 |
Click the Save changes button.
|
||
8 |
Click the Publish button to send the saved updated to all distribution channels. |
||
9 |
Click the OK button to confirm. |
||
10 |
Click the property name at the top of the screen to return to the Property Dashboard. |
Tip: Once added, you cannot delete an address. However, you can click the Edit button to modify it or click the Inactivate button to deactivate it. |
You can manually update an address that has not automatically GeoCoded. You can generate a GeoCode based on the address or by entering the longitude and latitude.
Follow the steps below to GeoCode an address:
Step |
Action |
||||||||
1 |
Click the Address link from the Property dashboard. | ||||||||
2 |
Click the Edit button to place the screen in edit mode. |
||||||||
3 |
Click the OK button to confirm. |
||||||||
4
|
|
||||||||
5 |
On the GeoCode screen:
|
||||||||
6 |
Click the GeoCode button. | ||||||||
7 |
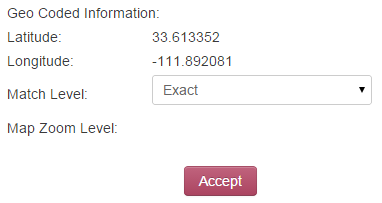
From the Match Level
drop-down list, located in the Geo
Coded Information part of the screen, select
whether the GeoCode is an exact or approximate match, or whether
it is based on a city location or postal code.  |
||||||||
8 |
Click the Accept button. | ||||||||
9 |
Click the Publish button to send the saved updated to all distribution channels. |
||||||||
10 |
Click the OK button to confirm. |
||||||||
11 |
Click the property name at the top of the screen to return to the Property Dashboard. |