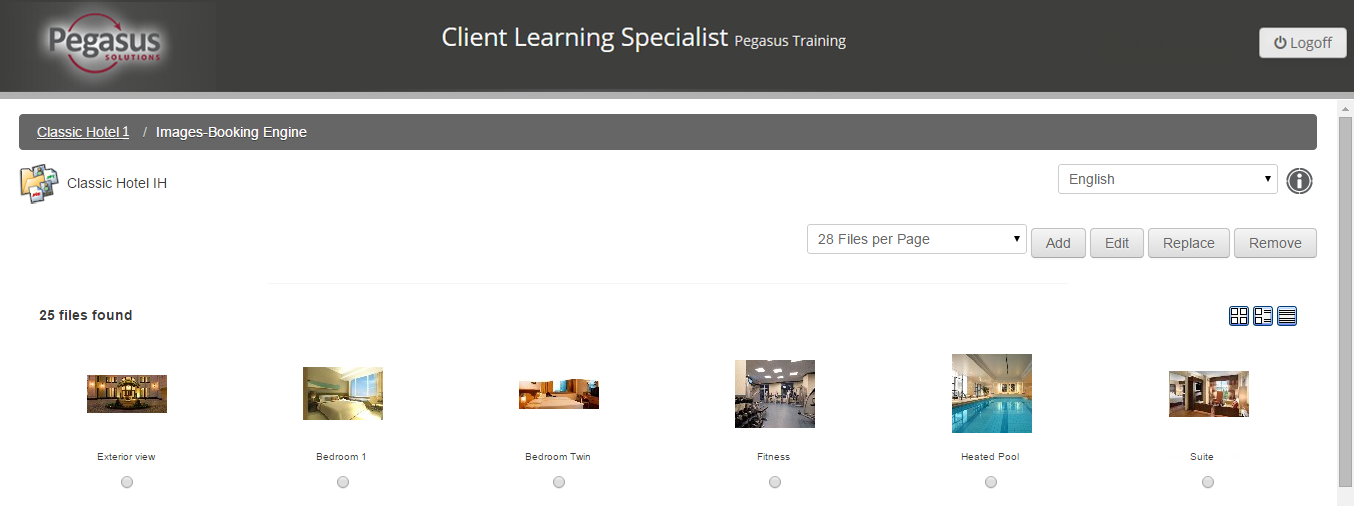
Use this option to add, edit or remove images that relate to your property. Images defined in Images-Booking Engine will display in the Call Center. Images stored here can also be associated to individual items (see Item Setup tab) and will then display in Call Center and IBE rate return screens. There is no limit to the number of images you keep in your image gallery.

Managing your images is a two-step process:
Step |
Action |
See |
1 |
Upload images | Add an image |
2 |
Define where and how images should display |
Caution: Only images that have been associated with a category during the editing process will be distributed to the Call Center Module. You can review images that have been set to display in the Call Centre Module on the Property dashboard. |
The image upload screen allows you to upload up to eight images at a time to your image gallery.
For best results, the recommended image size is 220 x 990.
To add images to the image gallery, follow the steps below:
Step |
Action |
1 |
From the property dashboard, click on the Images-Booking Engine link |
2 |
Click the Add button. The Upload Files pop-up window appears. |
3 |
Click Choose File to open a dialog box to navigate to an image file on your local computer or network. |
4 |
Click the Start Upload button to upload the selected images. |
5 |
Refresh the image gallery to display the newly uploaded images, by clicking one of the Display options. |
6 |
For each of your downloaded images, follow the steps described in the Edit an image section to describe how and where it will appear in the Call Center. |
Once your images are downloaded, you will need to add information about each image. To add or edit information about an image, follow the steps below:
Step |
Action |
||||||||||||||||||
1 |
Select the radio button under the desired image and click the Edit button in the upper right corner of the screen. The Change a Picture pop-up window appears. | ||||||||||||||||||
2 |
Enter or change the title of the image so that it is easily identifiable in your image gallery. |
||||||||||||||||||
3 |
Select the image category where you want this image to appear in the Call Center.
The following categories can be used:
|
||||||||||||||||||
4 |
Change the height and width.
|
||||||||||||||||||
5 |
Add border size as required. | ||||||||||||||||||
6 |
Enter the order you want the image displayed in the image gallery and Call Centre Module. | ||||||||||||||||||
7 |
Click the Save & Return button. | ||||||||||||||||||
8 |
Click the property name at the top of the screen to return to the Property Dashboard. |
To replace an image in your gallery with another image, follow the steps below:
Step |
Action |
1 |
Select the radio button under the image you want to replace. |
2 |
Click the Replace button. The Replace File pop-up window appears. |
3 |
Click the Choose File button to open a dialog box to navigate to an image file on your local computer or network. |
4 |
Click the Start Upload button to upload the selected image to your image gallery. |
5 |
Click the property name at the top of the screen to return to the Property Dashboard. |
To remove an image, follow the steps below:
Step |
Action |
1 |
Select the radio button under the image you want to remove. |
2 |
Click the Remove button in the upper right corner of the screen. |
3 |
A popup message is generated, click the OK button to confirm. |
4 |
Click the property name at the top of the screen to return to the Property Dashboard. |
You can change the way your multimedia gallery is displayed by clicking one of the three icons beneath the action buttons, located on the top right hand side of the screen. See RVNG navigation and visuals for more information.